
First-- thanks for your prayers and well-wishes for Matt's surgery yesterday. Surgery went "exactly according to plan," according to Dr. W, and recovery is following the expected trajectory as well. That means I've spent 90% of my weekend fetching ice packs and playing Surgery Slave, but I suppose it's a small price to pay. Not to mention, Matt did the same for me (for a much longer period of time) back in August, so...payback and all that, I guess.
Anyway. All of this being chained to the house over the weekend has given me plenty of time to work on a few Christmas crafts I've been meaning to do! May I introduce you to the fruit of my labor, my Snazzy New Door Decor?
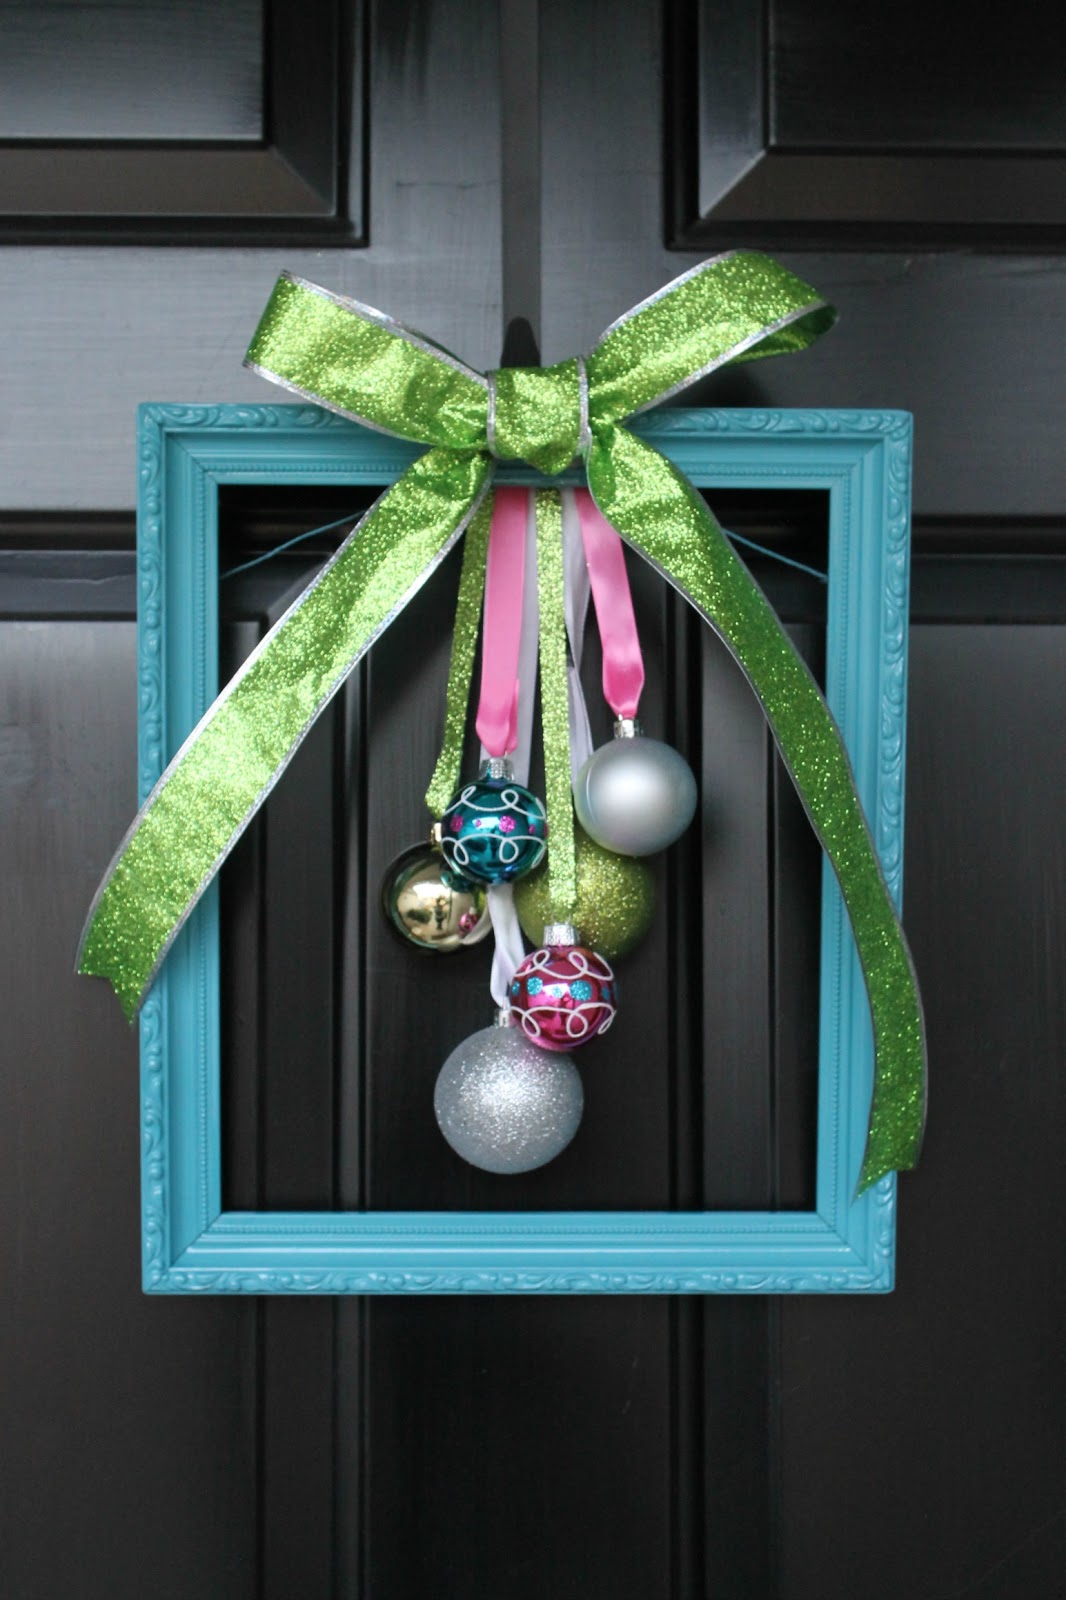
Pretty swanky, right?? And lucky for YOU (and because I seriously had nothing better to do all day than craft and take overly detailed pictures of myself doing it and then upload and edit them all...), I made a step-by-step tutorial so that you can make your very own!! I know. It's almost Christmas. Who has time for this nonsense now? Unless you're waiting on your husband to recover from surgery, that is. Well...maybe you don't do it now. BUT-- maybe in a few weeks, when all the Christmas decorations are 50-75% off, you pick up a few extra balls and rolls of ribbon and THEN you're all set to make this NEXT year, right?! See...planning ahead. It's a beautiful thing. In other words, "pin now, do later." Or do it now. Whatever floats your boat.
So here we go.
First of all, I was inspired by this pin I found on Pinterest:

Source: 1.bp.blogspot.com via Erika on Pinterest
Unfortunately, the pin doesn't go anywhere. As in, it's just a picture...no webpage, no tutorial, no nothin'. Who does this? This isn't the point of Pinterest, people! It should be a PAGE! But anyway. Luckily, I'm not deterred by a craft with no tutorial. I'll figure it out myself, dangit.
Step 1: Find a frame. You're gonna spray paint it anyway, so don't be too particular here. Pick up something at Goodwill or a yard sale. You're gonna remove the glass, too, so you don't even have to worry about that. I found my frame in my mother-in-law's basement. See? Free ninety-nine-- the price was exactly right. (Note: she gave me permission to take it. I'm not a robber, people.)

So get your frame, take out the backing, glass, mat, and everything else that isn't necessary. Lay it out on some old newspaper in the backyard. Or the garage. Or whatever well-ventilated space suits your personal spray painting standards.

Bonus points if your newspaper is more than two years old. I'm not sure how, but I feel certain that using an old newspaper will make this craft more successful. Trust me on this.
Step 2: Spray paint to your heart's content. Make sure you get all sides and angles evenly coated! I actually did two coats (with about 20 minutes of dry time in between).

Not pictured: About 8 unintelligent little gnat-type bugs that decided to land on my freshly painted frame. Seriously, bugs? In December? This whole wide world to explore, and you want to die a toxic drowning death by spray paint? Sheesh. Naturally, if you should encounter similar circumstances, I would recommend picking out the bug carcasses and hitting the marred area with an extra shot of paint. I would not judge you, though, if you chose to just let the bug rest in peace and paint over him. I mean, it's a textured frame. No one's gonna notice a little...extra.
So while your frame is drying, you can head back inside to work on the rest of the project.
Step 3: Collect your ribbon and some fun ornament balls.

Match up your ribbons and ornaments. I used a variety of ribbons and balls, cause I'm not so much into the matchy-matchy. So pair up your ribbons and balls to your liking.
Step 4: Attach the ribbons to the ornaments. I just laced them through the little hook thing, pulled it through about an inch, and used a dab of hot glue to make it stay.

Step 5: Arrange your ribboned ornaments into a pleasing "bouquet." I did this by holding them up in air with my hand so that I could adjust the length of the ribbons to get them staggered the way I wanted.
To me, the next part was the trickiest. Once I had the ornaments arranged the way I liked them, I had to figure out how to get them to STAY that way. I ended up carefully laying the whole thing down with the ribbons 'stacked' in the order/width I wanted them on the top. I thought about just tying a knot, but decided that then they might not fall in the right order (I wanted certain ones in the front, etc.)...so this is what I came up with.

Then I went through and hot-glued each ribbon to the one in front of it. Does that make sense? Unfortunately, I'm not talented enough to hold ribbon, use a hot glue gun, AND take photos with a dSLR camera at the same time, or I'd show you exactly what I meant...so a few 'after' pictures will have to do. This is basically my stack of ribbons, each hot glued to the one beneath it.

Step 6: Make a bow out of wide ribbon. You may notice I had that sparkly green ribbon in two widths. Yeah. I'm fancy like that. However, my bow-making skills leave much to be desired...especially since this ribbon only has one 'right' side. You know, so when I tie the bow, one of the loops is wrong-side-out? Tricky. There was a lot of twisting and hot gluing involved here, folks. Try not to look at it too closely, it's a little sketch up close. Ha.
Okay so apparently I failed to photograph a lot of steps here. Oops. So make your bow. Set it aside.
Step 7: After your frame is dry, get your bouquet of ornaments and hot glue the bundle of ribbons to the back of the frame. Cut off any excess ribbon that sticks up over the top of the frame (I had a lot). Then get your bow and glue it top front and center.
Step 8: Hang it on your door on a regular wreath-holder (or a nail would probably work too, or whatever else you use to hang things on your door). Wait for the neighbors to drive by and jealously stare at your craftiness.

My frame still had the wire hanger attached to the back, which you can see got painted blue with the rest of it. That was probably a mistake-- it would be way less obvious if it were still black or brass. Oops. So if you're leaving the wire hanger on yours, maybe tape that thing up at the beginning.

All in all, I am super happy with how it turned out! I used colors that I normally don't decorate with, but since it's on the front door...it doesn't really matter that it doesn't 'match' the rest of the house, right? I just think it's really fun and whimsical!

There you have it, folks. Think you can handle it? I'd love to see someone make one using different fun colors...I'd actually love to have one that was UGA themed...red frame, red/white/black ribbons and ornaments? Wouldn't that be cute? Maybe next time.
Oh, and once I had all my materials, this seriously only took an hour or hour and a half to complete, including dry time for the paint. Easy peasy. Have fun!
Love it! Glad to hear Matt's surgery went well, too!
ReplyDeleteI love this!!! :) I am thinking of copying this but using Easter eggs at Easter maybe? I think it could be cute!
ReplyDeleteVery cute! You totally should have made this an instructional video, by the way...
ReplyDeleteSuper cute! I love the teal-ish color of the frame!
ReplyDeleteLove this! I have all sorts of ideas running through my head as to how to use this -- birthday party hanger, Easter hanger, Spring, pick-me-up-in-the-middle-of-winter, it's the third Thursday in July -- LOVE IT!!!
ReplyDeleteMy front door is seriously lacking in decor. My self is seriously lacking in craftiness. My birthday is in 2 weeks.
ReplyDeleteDo you happen to see any connections here?
This was my Christmas present project twice over this year! Both in red and black! Your methods are slightly different than mine, but outcome is the same!
ReplyDeleteP.S. You should go in and change your pin of this original photo to the tutorial you've done! :)
I HATE it when pins don't go anywhere! Or when they go to the correct blog but not the correct post...it drives me sort of insane. Thanks for making a tutorial for this adorable project! I'll pin it!
ReplyDeleteThat looks amazing! Why do all my Pinterest projects end up as derp Christmas trees with glue all over them? WHY?
ReplyDeletePS - The first captcha that your blog gave me to comment was literally just a picture of a hat.
Beautiful! Well done. Yours is MUCH prettier and craftier than the one you found for inspiration. I like your colors and how you varied the lengths of the ornaments better. You should post your pic with a link back to this tutorial on Pinterest!
ReplyDeleteI say you did a really great job in doing that front door décor without the aid of a tutorial. But Christmas season has long gone. I wonder what other creative décors you have on that handsome-looking door of yours.
ReplyDeleteBarrett Elmore